Adding a Vehicle to CPLinQ HTB
This Article Applies From:
CPlinq Pro |

Introduction
This article is to help you add a user to your CPLinq PRO workshop on CPLin.
1 Pre-requisites
To be able to add a vehicle, an access to the Web interface on CPlinQ HTB as a Unit Manager is necessary.
1.1 - Suggested readings before diving-in
2 Access to the vehicle creation interface
Once you are connected as a Unit Manager, you can proceed to the creation of the new vehicle.
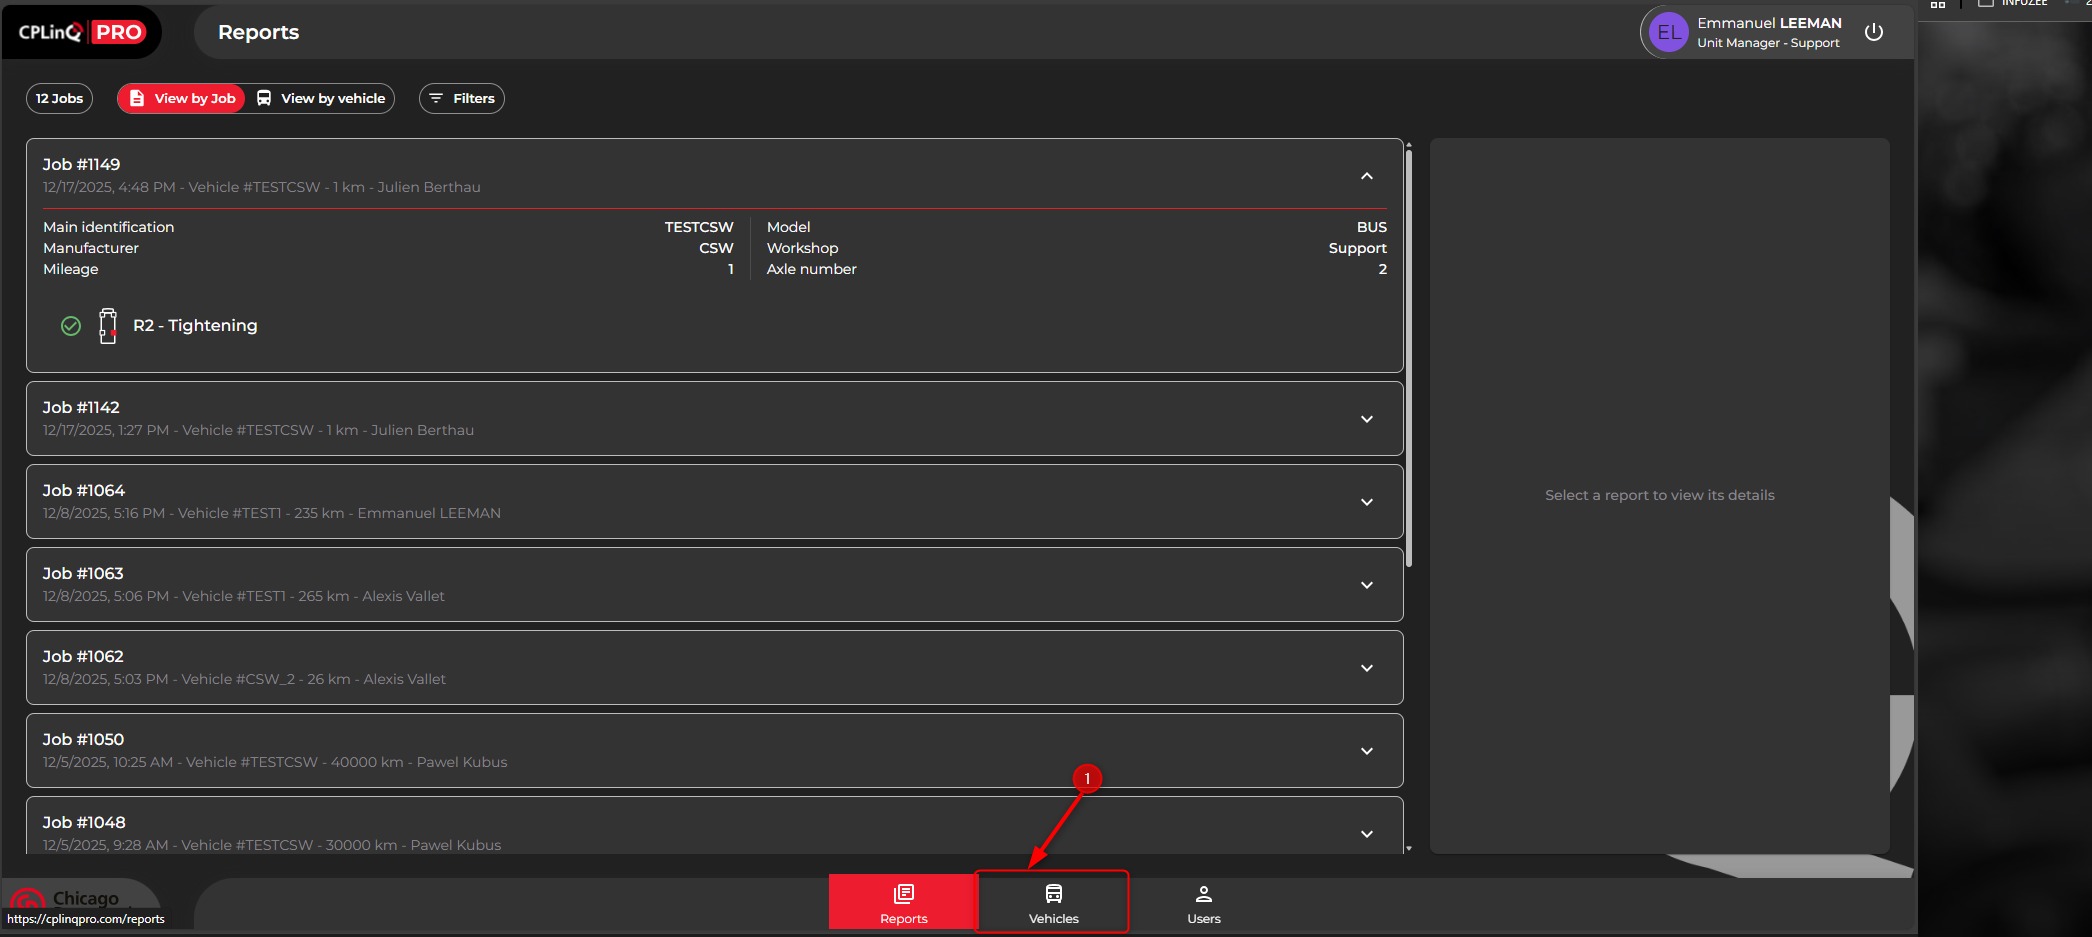
- Start by clicking ont the "Vehicle" tab on the bottom in middle of the page :
- Proceed to clicking on "New Vehicule" on the top right corner of the page.
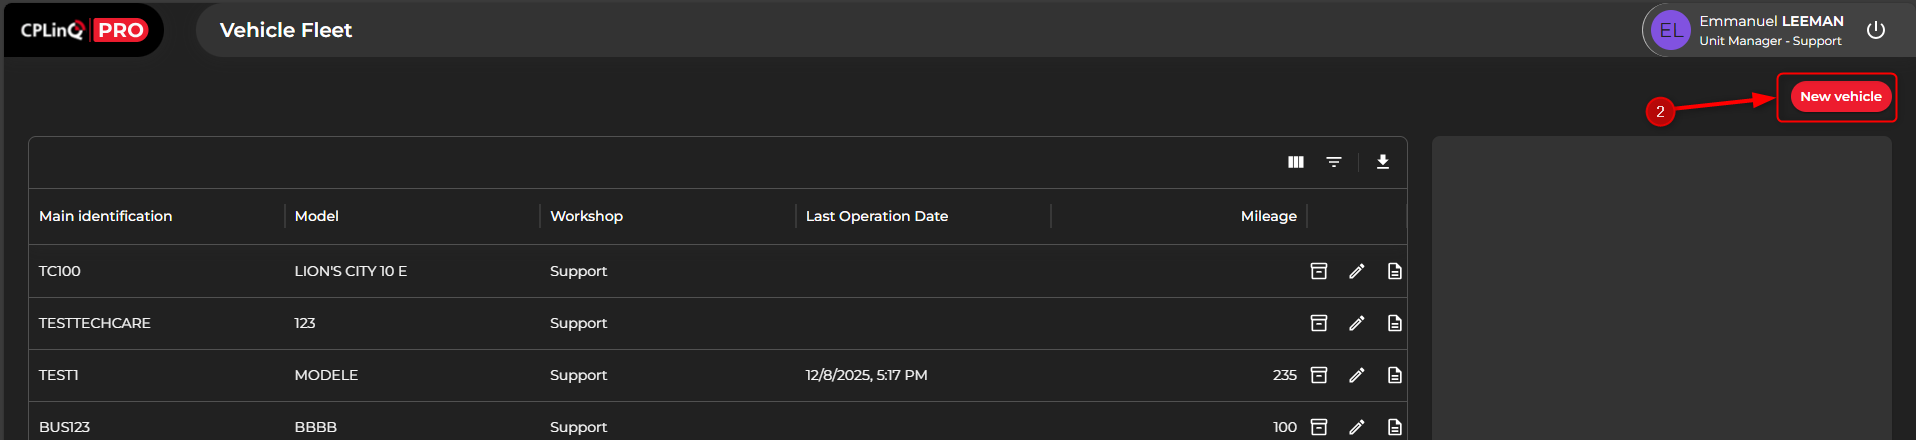
- A small window will appear
3 Entering Vehicle Information
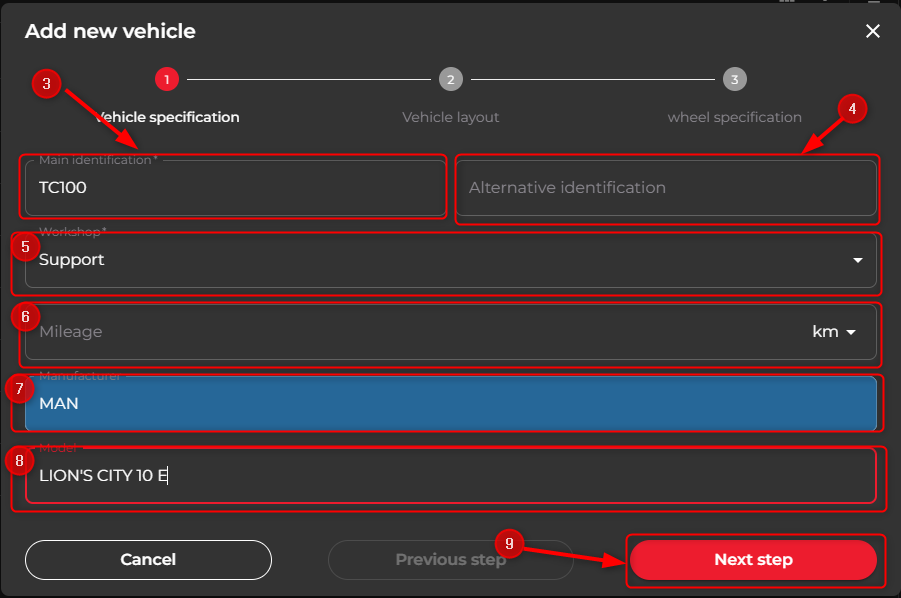
- A small window will appear
- Enter the Main identification of the vehicle. This would be the name that is used in the workshop known by all the operators
- Enter an Alternative Identification if needed
- Select the concerned workshop
- Enter the mileage if it is known. If it is not, it can be entered by the operator on the application while starting a maintenance job
- Enter the name of the manufacturer of the vehicle
- Enter the model of the vehicle
- Click on "next step"
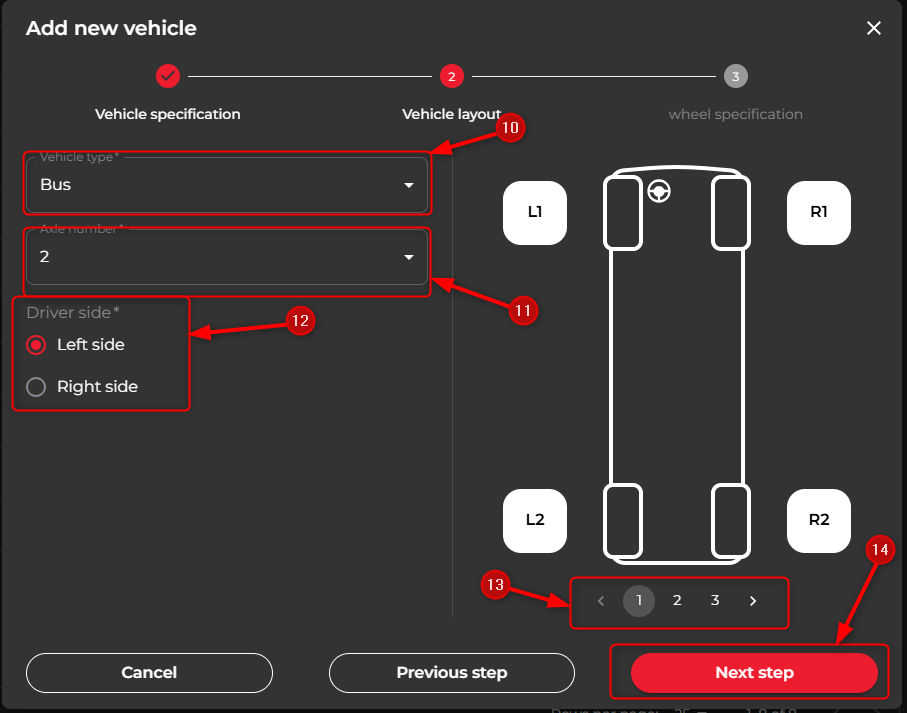
- Select the Vehicle type from the drop down list
- Select the axle number
- Select the driver side
- Choose the physical layout of the vehicle by clicking on the right or left arrow
- Click on next step
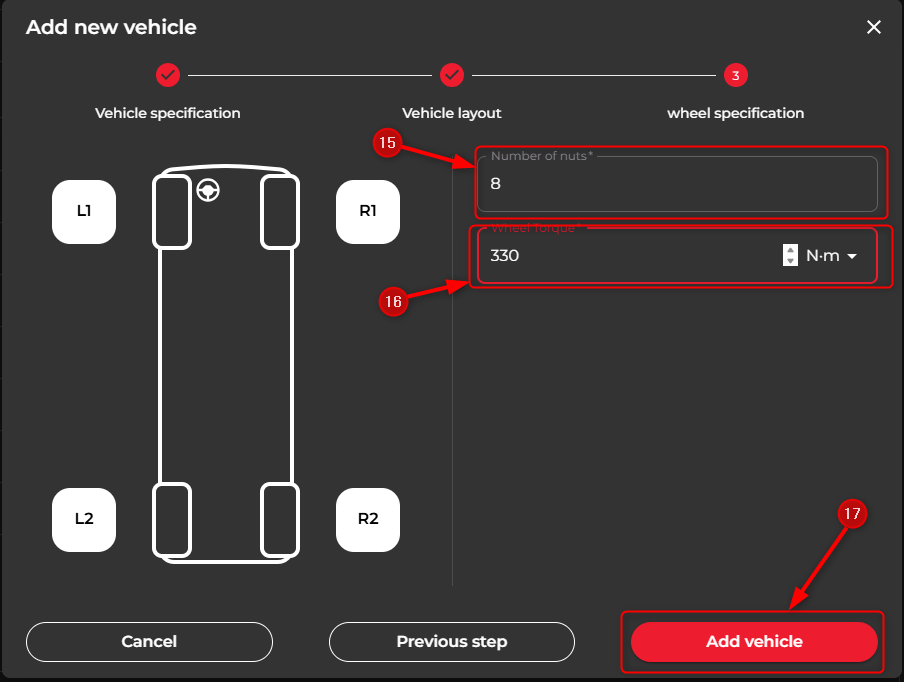
- Enter the amount of nuts per wheel
- Choose the wheel torque that is needed
- Confirm by clicking on "Add vehicle"